


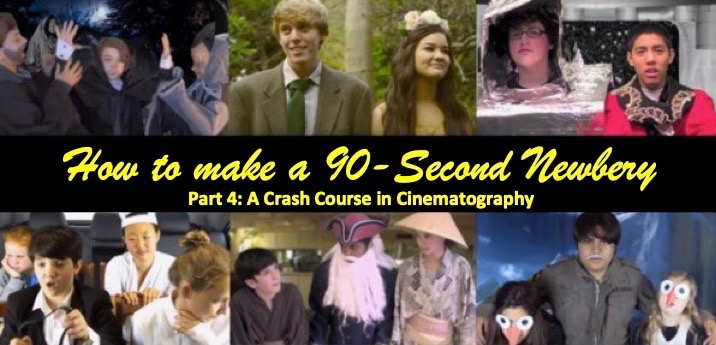
How To Make A 90-Second Newbery, Step 4: A Crash Course In Cinematography
December 14, 2018
« An epic Order of Odd-Fish cartoon by Andreas Sconzo! Listen To Me On THREE Podcasts! The Secrets of Story Podcast and The Alien Adventures of Finn Caspian and NewberyTart »
|
This is the fourth step in the “How To Make A 90-Second Newbery” series. If you haven’t already, check out Step 1: Watch Great Previous 90-Second Newberys and Step 2: Read The Book And Start Planning, and Step 3: Breaking The Story And Writing The Script.
It’s the end of the year, and that means lots of folks are making their movies for next year’s 90-Second Newbery Film Festival. I can’t wait to see them!
To help both beginner and experienced filmmakers, I’ve put together a step-by-step “How To Make A 90-Second Newbery” series. You can find links to the all of these steps on our video resources page.
Today’s step is about cinematography—the art of choosing what audience sees on the screen. Where are the actors in the frame? What angle does the camera have? Does the camera move? And so on.
Too often, first-time filmmakers just shoot all the actors from too far away, in more or less full-body shots. They plop their camera any old place and record the actors chatting away about the plot, with no cuts and no forethought as to where the camera goes—as though the camera just happened to wander into the room.
Anybody who has seen a good movie knows that’s not how it works!
When you’re making a movie, you have to learn to rely not on words to tell your story, but images. For instance, if you watch Star Wars even with the sound off, you can still more or less understand the story. How is that?
VISUAL STORYTELLING! You must tell your story in images, movement, and camera angles. Dialogue is actually the weakest tool in your box. If you learn the following secrets of cinematography, you can take advantage of this “visual storytelling” to make the audience feel emotions, and even learn story information, without using any words at all. That’s powerful stuff.
Today I’ll teach you about a dozen different kinds of shots. I recommend that you force yourself to include at least one instance of each of these shots in your 90-Second Newbery movie. By making yourself vary your shots in this way, you’ll end up a more visually interesting movie.
(And I promise at the end of this long post I’ll let you in on one final super-secret that will make all your shots look like gold, even if you’re using a cheap camera and you’re just fooling around with your friends. Read all the way to the end to learn it!)
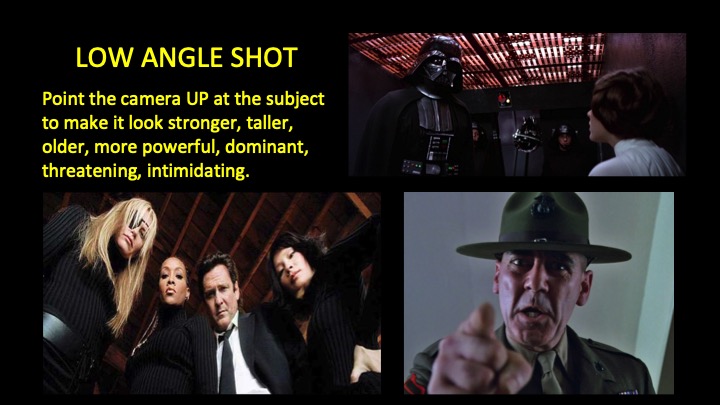
Let’s start with a simple trick that works every time. It’s called a Low Angle Shot. That’s when the camera is placed below the subject, with the camera is pointing up.
|
Star Wars, it’s a low angle shot. Do you have a bully character in your movie? Or someone that you wish looked older or more threatening? It doesn’t have to be negative, either: do you want make someone look more heroic, more victorious? Use the Low Angle Shot! It’s a cheap, easy, and clever way to get that effect.
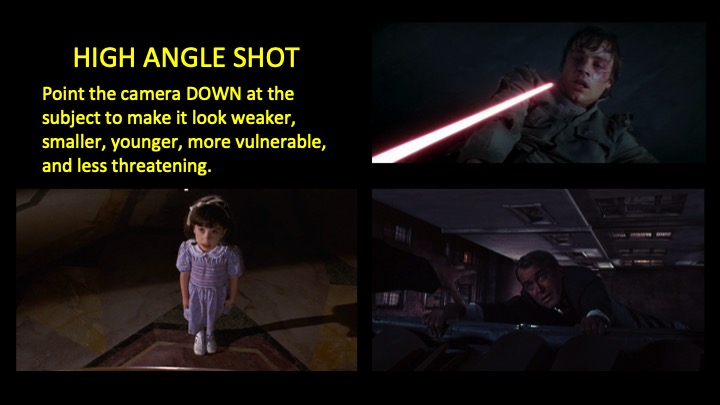
The opposite works, too. The High Angle Shot is when the camera is placed above a subject with the lens pointing down:
|
If you want someone to look vulnerable, weak, small, or young, use the High Angle Shot. Is your character losing a fight? Do you want them to seem pathetic? Do you want the audience to feel some kind of sympathy for your character? Do you want them to seem young, fragile, and submissive—an underdog? Then the High Angle Shot is your first choice.
Now that I’ve taught you these two shots, you’ll notice filmmakers use them all the time! And they can be used in combination, to powerful effect—cutting back and forth between a Low Angle Shot and a High Angle Shot, to make the viewer feel that whatever is in the first shot is dominating, watching, oppressing, or defeating the thing in the second shot. That’s called a Hi-Lo Compound. You can see this back-and-forth switching in this scene from Alfred Hitchcock’s Psycho, in which the heroine is approaching a creepy old house. You can feel how the house is subtly threatening the vulnerable heroine as she approaches it. Even if we muted the great music, we’d feel the creeping dread, because of the alternating high and low angle shots:
Speaking of alternating shots, let’s talk about how to film dialogue. Too often, beginning filmmakers shoot dialogue as though it’s a play: the camera is carelessly positioned far away from both characters, and they talk back and forth without any cuts. Most of the time, this is a big mistake. Your audience will be bored out of their minds! In most dialogue scenes, good cinematographers use a combination of three kinds of shots: the Over The Shoulder Shot, the Two Shot, and the One Shot or Close Up.
By constantly switching the camera angle, it keeps the movie visually interesting. It also gives you an opportunity to speed up the movie: you can use the cuts between shots to remove the pauses, stutters, flubbed lines, and “umms” in between lines. And it means you don’t have to shoot the whole conversation perfectly in one take!
Let’s look at the Over The Shoulder Shot first.

|
The Over The Shoulder shot emphasizes that the two characters share the same space in an intimate way. The physical connection can be used to convey information about their relationship: tension, closeness, desire, revulsion, whatever. The Over The Shoulder Shot uses the head and shoulders of one character to frame the head of the other character. The two characters are “married” in the frame; we feel a connection between them; we feel like we’re eavesdropping on a private conversation. (Hint: the person whose face we’re seeing doesn’t always have to be the one talking! Sometimes it’s more interesting to see the changing reaction on one character’s face while the unseen other is talking.)
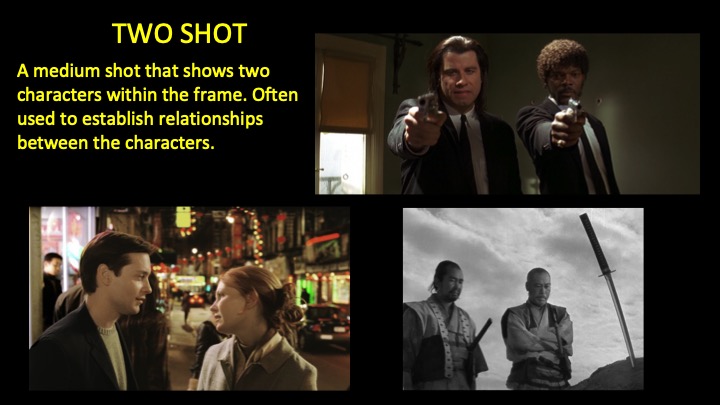
The second kind of shot that is used in dialogue scenes (as well as other kinds of scenes) is the Two Shot. This is when two characters are filmed in a single shot, usually from the mid-chest up. This shot shows us the relationship between the characters: whether friends, co-workers, enemies, lovers, whatever.
|
The Two Shot conveys even more intimacy that the Over The Shoulder Shot. Use it for those parts of the conversation when both characters are coming to an agreement, or are suddenly confronting each other, or are considering something together, or are teaming up on someone else. By making two characters share the frame in this way, it signals some sort of relationship between them.
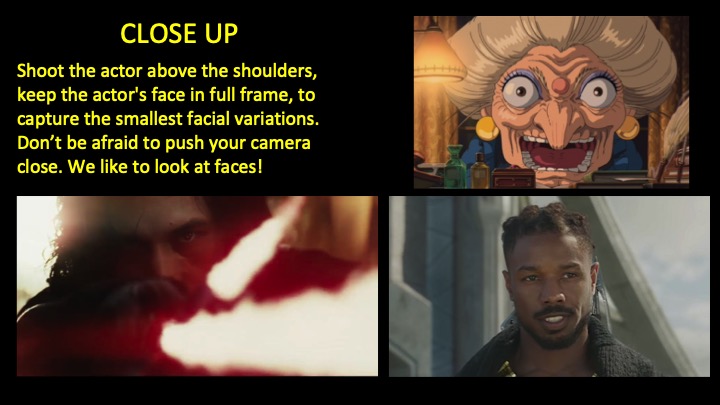
Next up is the One Shot—that is, a shot focusing on just one character, with nobody else in the frame. A Close Up can be a kind of One Shot:
|
As you can see, a Close Up is great for when you want to get across a feeling of heightened intensity or emotion. We use this when characters are caught up in their own emotion, when they’re speaking their own truth, when they’re staking out their own ground. Here’s a fun trick: the closer we get to a character, the more sympathy we are likely to feel. And strangely, the opposite is true, too: the Close Up can also be used to make the audience feel fear or hatred when the camera forces them to get close to a character who has already been established as a villain. Save your Close Up for those moments of heightened emotion!
So now that we have seen what the Over The Shoulder Shot, the Two Shot, and the One Shot / Close Up are, let’s see how How To Train Your Dragon alternates between these three different kinds of shots for a good dialogue scene between a father (Stoick) and his son (Hiccup):
This clip brings together everything we’ve learned so far! Note how in the Over The Shoulder shots, Stoick’s shadow frames Hiccup, taking up space in the boy’s frame and thus subtly dominating him. Also notice how Stoick is almost always shot in a Low Angle Shot (making him look bigger and more dominating) and Hiccup is almost always shot in a High Angle Shot (making him look smaller and more vulnerable). The times in which Stoick and Hiccup are “connecting” (for instance, by laughing together) are shot as Two Shots, to emphasize those moments of closeness; and so at the end, when they are awkwardly not connecting, we feel it all the more because it’s a Two Shot which contrasts against the previous Two Shot.
Imagine how boring this scene would be if the camera never switched angles. If such techniques are good enough for DreamWorks, they’re good enough for you! VARY YOUR SHOTS IN YOUR DIALOGUE SCENES!
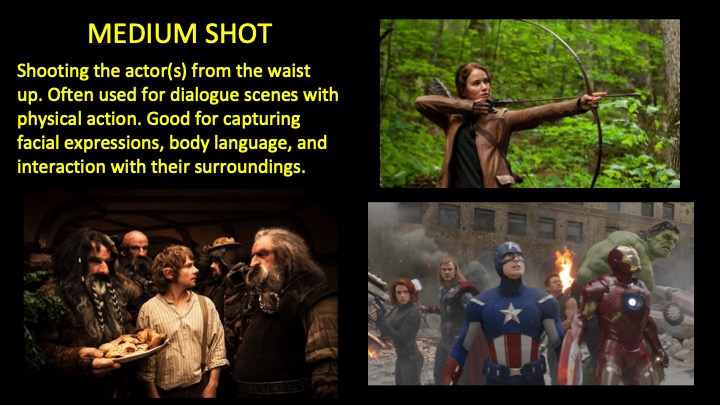
Next let’s look at the Medium Shot, in which we see a character or characters more or less from the waist up. This is good for scenes in which characters are doing some interesting physical action, or if the characters are interacting with the environment around them:
|
The Medium Shot is super useful! But beginning filmmakers rely on it too much, maybe because it feels like a safe choice. I’ve seen too many 90-Second Newberys that are just nothing but a bunch of medium shots. You should always be cutting to a fresh new shot every few seconds, especially in a movie that’s supposed to be only 90 seconds long.
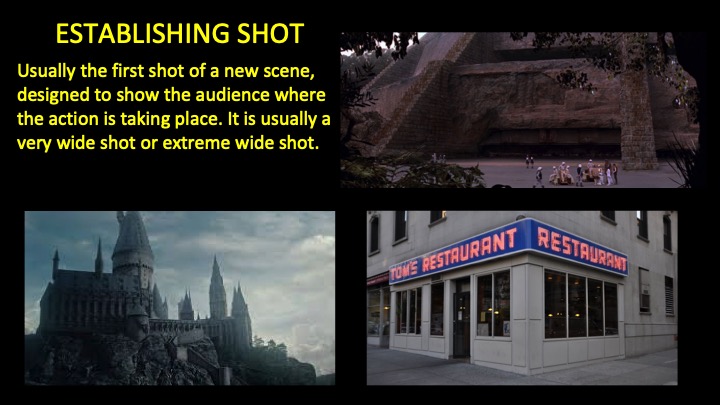
How do you indicate to the audience that you’ve switched your scene from one location to another? Sometimes it’s too disorienting to switch locations, especially if the audiences hasn’t seen that location yet, or if we’re switching between many locations. In that case, use an Establishing Shot. That’s just a few seconds of a wide shot of the location, usually from outdoors:
|
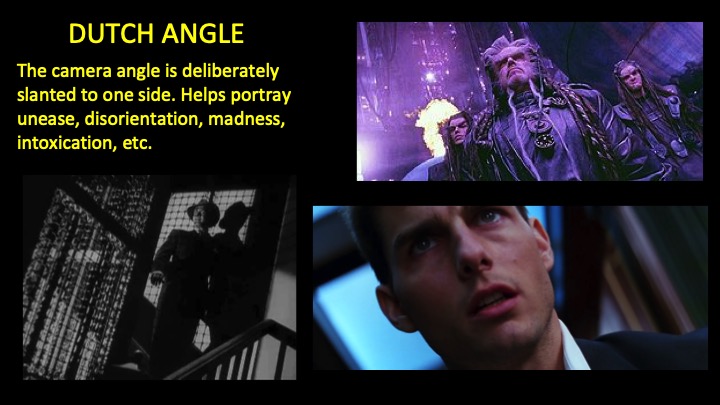
Sometimes, just by changing the angle of the camera, we can change the emotions of the audience. That’s definitely the case with the Dutch Angle. With this shot, we can give the audience a sense of unease, or fear, or dread . . . or indicate that a character is intoxicated or hallucinating! How do we get such extreme unsettling effects? Simply by tilting the camera a little on its side. It works!
|
Bonus: if you want the audience to feel really unsettled, keep tilting that camera, keeping it in motion throughout the shot, even turning it upside-down during the shot! Don’t think of the camera as an objective eye that takes in the scene dispassionately. Use your camera in a subjective, emotional way to get passionate effects. Watching images directly engages our primitive lizard brains, getting visceral involuntary reactions from the audience. Take advantage of that!
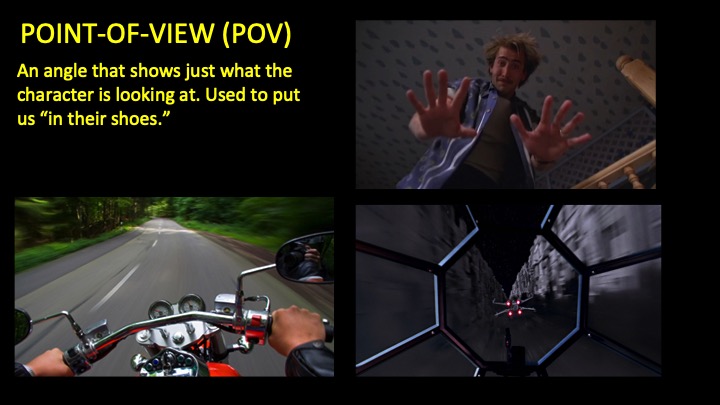
Let’s take it a step further. Sometimes it pays to almost literally get in the head of a character. Somewtimes you want the audience to be flying along with your character, feeling like they’re in the movie themselves. In this case, what you want to use is the Point Of View Shot.
|
Warning: with great power comes great responsibility! Don’t overuse this technique or your audience will get confused and impatient. Doing your entire movie as a Point Of View Shot is a no-no, unless you work very, very, very hard to make it interesting. Don’t just swing the camera around, pointing in random directions. That will only serve to disorient, enrage, and bore the viewer. In general, choose only special, brief moments for that Point Of View Shot.
OK, two more shots: one that’s very much overused by 90-Second Newbery filmmakers, and another one that’s not used nearly enough.
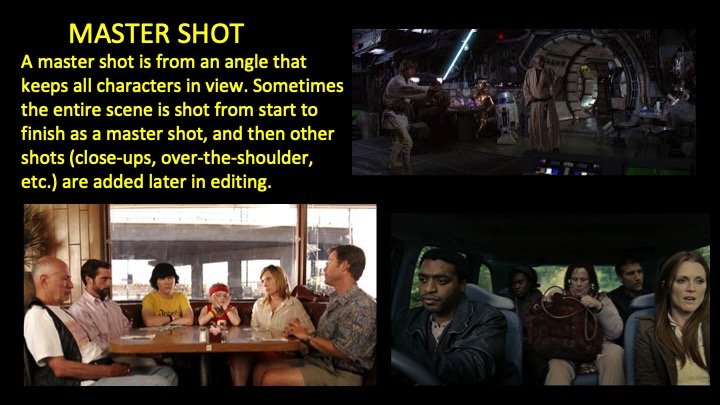
A Master Shot is a shot of the entire scene, from start to finish, from an angle that keeps all the actors in view.
|
Too often, beginning filmmakers make the error of shooting an entire scene as a Master Shot and then thinking they’re finished. That’s not a good idea, unless the scene is very short. For a longer scene, I recommend shooting the whole scene several times.
First, have your actors perform the scene from beginning to end while you shoot it in a Master shot. Then have your actors perform the scene again, with you shooting it a various angles as described in the many, many shots above. Do this again and again from various angles in order to get the effects you want. And it’s okay to shoot it out of order! That’s because you’re going to take all that video you shot, and edit together only the best parts in your editing software. You’re not using expensive film, but cheap video, so shoot a lot so that you have more choices when you’re editing! And in that edited scene, you can switch from shot to shot, from Master Shot to Close Up to Over The Shoulder Shot and so on, in order to tell the story visually and effectively.
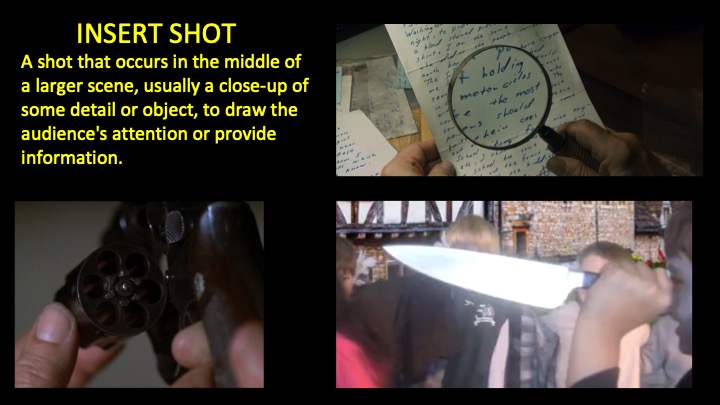
The last shot I’d like to talk about is very underused by 90-Second Newbery filmmakers, and I’d like to see more of it: the Insert Shot.
|
The Insert Shot is just a shot (almost always a Close Up) of a smaller detail that is stuck into a scene for informational purposes or to provide dramatic emphasis. This can be a close up of someone drawing a gun . . . or a close up of the letter that a character is reading . . . or a close up of a hand turning a doorknob . . . you get the idea. By combining lots of little insert shots, you can get across the action of a scene in a much more creative and visually interesting way.
For instance, check out how the movie Shaun of the Dead takes a scene that should be boring—the hero getting ready to go to work—and makes it energetic, watchable, and fun by building the scene from lots of quick Insert Shots and Close Ups:
Okay, I could go on and on about cinematography and different shots, but I think you get the main idea. Hopefully I’ve given you some fresh ideas that will make your movies even more interesting to watch!
Now here’s the treat I promised for the end of this post: a quick way to make your shots look good, even if they’re shot on a cheap camera, even if you’re just shooting everyday life.
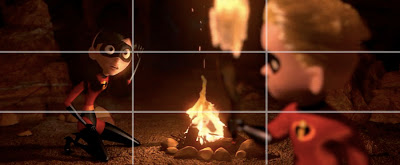
It’s called the Rule of Thirds. Once you understand this tip, not only will your camerawork improve, but you’ll also notice how it’s used all the time in movies and TV and even photography.
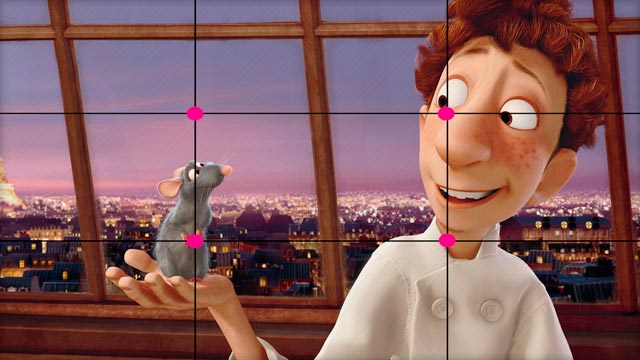
|
The basic idea of the Rule Of Thirds is that the subject(s) should be away from the middle of the frame. It turns out that the human eye is naturally drawn to certain intense “hotspots” on the screen. If you line up your subject with these hotspots, it will make for a more interesting image.
|
How does it work? Simple. Imagine an invisible tic-tac-toe board laid over the scene, breaking your frame down into a three-by-tree grid. The special “hotspots” are where those imaginary lines would be. It turns out our eyes are particularly drawn to the spots where the lines intersect.
|
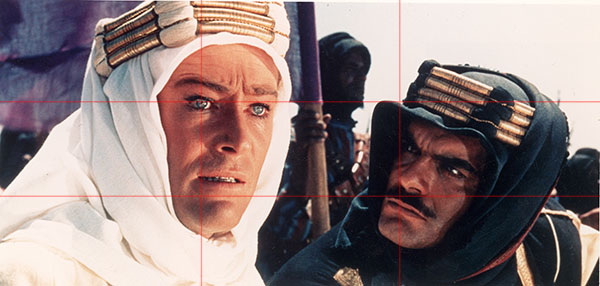
If you have a character in your scene who is speaking, the Rule of Thirds says it’s a good idea to line up their face with one of those intersecting spots. Or if there’s something special happening in the scene that you want the audience to notice, make sure it occurs along one of those lines, or where the lines intersect.
|
|
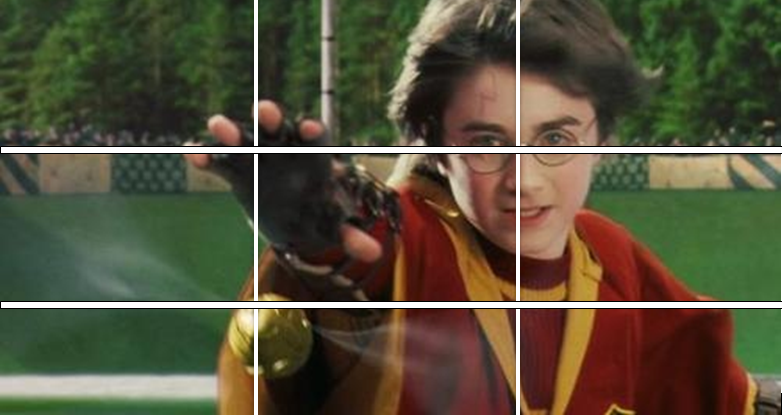
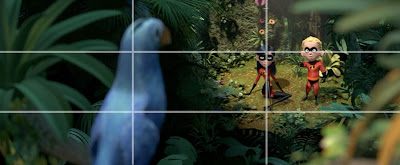
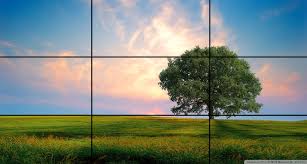
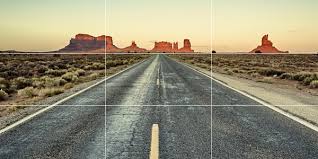
In particular, unless there’s a good reason not to, cinematographers often line up the image’s horizon line with one of those imaginary horizontal lines. It just looks better.
|
|
Should every single one of your shots use of the Rule of Thirds? No. There is also power in putting the subject in the smack center of the frame. For instance, almost every shot in the action-packed Mad Max: Fury Road is composed with the subject in the center of the frame, so that the eye doesn’t have to move around (Here’s a video essay about that). And director Wes Anderson loves to use compositions with the subject in the center, which gives a deliberately fussy, stagy effect (Here’s a video essay about that, too).
Okay, after all that information, I think we need to take a break! But I hope that this post helps you in making your 90-Second Newbery movie. And you’ll definitely watch movies and TV with a more educated eye now!