bride of the tornado cover dare to know cover order of oddfish cover

The Order of Oddfish

cap

How To Make A 90-Second Newbery, Step 6: Shot-By-Shot Analysis Of A Wrinkle in Time

This is the sixth step in the “How To Make A 90-Second Newbery” series. If you haven’t already, check out Step 1: Watch Grat Previous 90-Second Newberys and Step 2: Read The Book And Start Planning, Step 3: Breaking The Story And Writing The Script, Step 4: A Crash Course In Cinematography, and Step 5: Top Mistakes To Avoid.

All right, you’re ready to rock! You’ve watched lots of great 90-Second Newbery videos to get inspired (Step 1). You’ve read your Newbery-winning book, figured out your unique take on the material, and marshaled your resources (Step 2). You’ve broken the story and written an amazing script that fulfills your twist and tells a complete (if condensed) version of the story in a way that makes sense (Step 3). You’ve learned the basics of cinematography (Step 4) and you’ve taken steps to avoid the classic mistakes of many 90-Second Newbery movies (Step 5).

You’re ready to shoot that movie!

But maybe you’ve never made a movie before. You may have a great script, but what if everything falls apart when you’re actually shooting the movie? Or what if you bungle editing it? Maybe you don’t know how to frame a shot, you don’t know how to move the camera, and you’ve never used video editing software. There’s too much to know! It can feel overwhelming!

Relax. You’ve been watching TV and movies all your life. You already have all the knowledge you need inside you. All I need to do is remind you of that knowledge.

To do that, let’s analyze the very first 90-Second Newbery movie, of Madeleine L’Engle’s 1963 Medal winner A Wrinkle in Time.

As you watch the movie below, pay attention to where the camera is placed. I’m going to be talking a lot about how to compose your shots. It doesn’t cost any extra money to put your camera in the right place. And the difference between a movie that is well-shot, and a movie where the camera is just carelessly plopped around anywhere, is crucial. There’s a whole cinematic vocabulary that can help you tell your story. (I explain a lot of it in Step 4: A Crash Course In Cinematography.)

Also, pay attention to the sound. Sound is one of the most powerful tools a filmmaker has. But this powerful tool is often ignored by beginners because they assume a movie is all about the moving image. On the contrary, the difference between a good or bad movies often comes down to sound design.

After we watch the movie, I’ll examine it shot by shot and and point out techniques that you can use to make your own movie—telling the story not only through spoken dialogue, but also with camera angle, shot choice, transitions, sound effects, and special effects.

Let’s jump in and watch the movie first:

Not bad, huh? Some great acting. Told the complete (abbreviated) story. Only 90 seconds long, if you don’t count the credits. Even a few fun special effects and sound effects. And the whole thing was shot on an old 2010-era flip camera no bigger than an iPhone. (You don’t need fancy equipment.)

Now let’s analyze that movie shot-by-shot, and understand the decisions that made it effective.

Shot #1: Meeting Meg

  • Introduce the hero ASAP. We know the hero’s name and her situation in the first few seconds. Of course not every 90-Second Newbery movie should start exactly this way. But you should always try to establish the hero very quickly.
  • Pay attention to color. If you happen to be shooting a scene indoors, try not to shoot with white walls in the background. These green walls make a better background than white walls, and they complement Meg’s blue sweater nicely. The splashes of red throughout make for an interesting contrast.
  • You can use sound effects in the background. Do you think it was really raining outside when they shot this? Of course not. That’s just a thunder-and-rain sound effect from iMovie’s built-in library of free sound effects. Notice how the rain sound effect continues without interruption past the cut into the next shot and through the few shots after that.

Shot #2: Meeting Charles Wallace

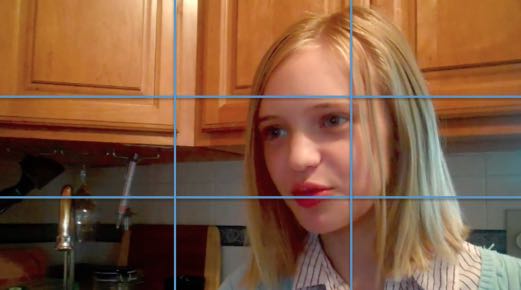
  • The Rule of Thirds. I added those blue grid lines over the shot to illustrate the famous “Rule of Thirds.” That is: When you’re holding the camera, imagine invisible grid lines that divide the frame into nine equal sections like you see here. Our eyes are naturally drawn to those invisible lines—and our eyes are very much drawn to where those invisible lines intersect. So if something important is happening in your shot, make sure it’s happening on one of those lines, or where the lines cross. Here two lines intersect on Charles Wallace’s head, which makes sense because he’s the most important thing in this shot.
  • Make sure you have props. Charles Wallace’s line “I made hot milk and a sandwich” works much better because he is literally holding milk and a sandwich. Use props whenever you can. Give your characters objects to hold and manipulate, to give and take. This adds visual interest.
  • Angling the camera “down” on someone makes them look younger, more powerless, more submissive. The boy who plays Charles Wallace here is ten years old. But the actual character of Charles Wallace is only four years old! How do you make a ten-year-old look younger? It turns out that if you hold the camera such that it is “looking down” on someone, this has the effect of diminishing the subject, making them appear less powerful, less significant, even younger. Also, if you want to shoot someone looking scared or submissive, do a “high angle” shot like this.
  • Consistent background sound can “connect” scenes. Even though the scene has changed, the rain-and-thunder sound effect from the previous shot has continued uninterrupted, which subtly indicates to us that we’re around the same location at the same time. It’s not the next day or hours later.

Shot #3: Meg responds to Charles Wallace

  • Angling the camera “up” at someone makes them look older, more powerful, more dominant. To emphasize that Meg is older than Charles Wallace, we shoot her from (ever-so-slightly) below. If the camera is “looking up” at someone, it has the effect of making them look more powerful, more intimidating, and older. If you want to shoot someone looking scary or threatening, do this kind of “low angle” shot (but more extreme than this).
  • In a scene of two people talking to each other, have each of them stay on “their” side. Throughout this conversation, as we cut back and forth, Charles Wallace stays on the left and Meg stays on the right. It would be spatially confusing if Charles Wallace said something while looking to the left, and then we cut to Meg responding while also looking to the left. In general, if two characters are interacting in a scene, imagine an invisible line between them and keep the camera on one side of that line throughout the scene. This is called “The 180 Rule.” Note: if you want to get a “jarring” effect (let’s say there was an explosion and both characters suddenly react), go ahead and break this rule.
  • Get out of your classroom and into a real location. I get a lot of 90-Second Newberys in which the whole thing is shot in a classroom or school hallway or a corner of the library. Those are fine, but it’s much more effective to try to shoot at the right location. This scene in the book is set in an ordinary kitchen at the Murrys’ house, and so the group took the trouble to shoot it in a real family’s kitchen. Take the time to find and use the right location.
  • The Rule of Thirds. Meg’s face is positioned right where there are two intersections of the lines on our invisible grid. Remember that Rule of Thirds! Framing the shots using it almost always leads to a more pleasing result.

Shot #4: Back to Charles Wallace

  • Continuity: Props and costumes shouldn’t appear or disappear midway through a scene. Notice how Charles Wallace is still holding the milk and sandwich as he was in his previous shot. This is called “continuity” and it’s harder to achieve than you might think. What if you are shooting a scene over two days, but your actor ends up wearing a different shirt on those two different days? Or what if you forget on the second day to bring in a prop you used the first day? You don’t want shirts suddenly changing in the middle of a scene, or props appearing and disappearing. Keep track of that.
  • 180 Rule and Rule of Thirds. Once again, we’re keeping Charles Wallace on the left and Meg on the right, and Charles Wallace’s head is right smack dab in the intersection of two lines.

Shot #5, Part 1: “Mom, Where’s Dad?”

  • Unbalanced Symmetry. Seeing Meg on the left side, and emptiness of the right side, makes us unconsciously want the right side to be filled with something. We call this “unbalanced symmetry.” It creates an expectation that something will soon happen on the right side. And lo and behold, a second later . . .

Shot #5, Part 2: “He’s On Another Planet”

  • Balanced Symmetry . . . Mrs. Murry pops her head in the right side, completing the symmetry! Use unbalanced symmetry to create unconscious expectation in viewer’s mind, and then fulfill (or don’t fulfill, depending on your aim) that expectation.
  • Depth of Field. Note that Mrs. Murry is further away from the camera than Meg; the window is even further away; and the house beyond the window even FURTHER away. Depth like this makes visually interesting shots. Get your actors away from walls, away from corners, and put them at various distances from the camera. Here’s a classic use of “depth of field” from Citizen Kane.

Shot #5, Part 3: “I Hear Something Outside”

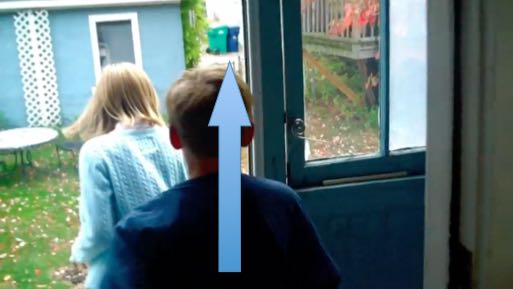
  • Left-to-right vs. Right-to-left movement. Charles Wallace moves across the frame from left to right. Here’s a weird fact: movement from left-to-right on a screen feels “correct” and “easy” to our eyes, while moving right-to-left feels “wrong” and “difficult.” Often the hero in a movie (or whoever has the initiative/momentum in the scene) moves left-to-right, and villains (or whoever is resisting what is happening, or doing something difficult or “wrong”) move from right-to-left. And that’s not just in movies! Think about video games: in “Super Mario Bros.” and indeed almost all side-scrolling video games, your movement goes from left-to-right and almost never right-to-left. (A similar bias in our minds exists for vertical movement: upward movement onscreen feels “hard,” while downward movement onscreen feels “easy”). So if you want to show a character doing something that you want the audience to feel is impossible, have them moving “uphill” from right-to-left in your shot. If you want to make a movement feel easy or inevitable, have them moving “downhill” from left to right. Using these psychological tricks can add a lot of hidden power to your shots. Here’s a short video that explains this trick further.
  • Complicated shots are fun to watch. There were three parts to this shot: Meg asking “Mom, where’s Dad?”, and Mrs. Murry popping in to say “He’s on another planet,” and Charles Wallace crossing left-to-right in front of them saying “I hear something outside.” What could’ve been a humdrum bunch of lines becomes interesting to watch because we took time and care to set up an interesting shot with fulfilled symmetry, depth of field, and character movement that takes advantage of our minds’ inherent biases. Plan your shots creatively!

Shot #6: Running Outside

  • Background sounds are a powerful tool. An ominous droning noise starts up, making us feel that something supernatural is about to happen. Use background sound to create and manage expectations in the audience.
  • Handheld moving camera can give an energetic, immediate feeling. Up until now the camera has stayed still for each shot. Now that we’re entering the world of adventure, we switch for a moment to this jittery, on-the-move shot as we follow Meg and Charles from behind as they go outside. It feels like we’re tagging along on the adventure with them. Use a variety the shots like this to keep the audience engaged!

Shot #7, Part 1: Mrs. Whatsit

  • Use background sound to link shots together. The rain-and-thunder background sound linked the beginning shots together. Now we’ll use the new droning background noise to link this shot with the previous shot and with subsequent shots. By laying in this background sound over a series of shots, it will cause the audio in all the shots to flow together, without a distracting difference in background noise every time the shot changes.
  • Get your camera outside! As much as possible, shoot outside. There is more natural depth to your field. Outside is more interesting to watch than a bunch of boring rooms, especially if they are classrooms or school hallways.
  • Costumes are important! All three witches who show up in this shot have elaborate, goofy costumes. We immediately understand that they are weirdo characters and it’s much more fun to watch than if these actors were wearing their ordinary clothes and just acting like witches. Don’t skimp on costumes, they will make your movie.
  • Switch up the camera movement. In the last shot the camera was moving forward; now it’s slowly moving backward! Keep switching up the camera movement to add visual interest.
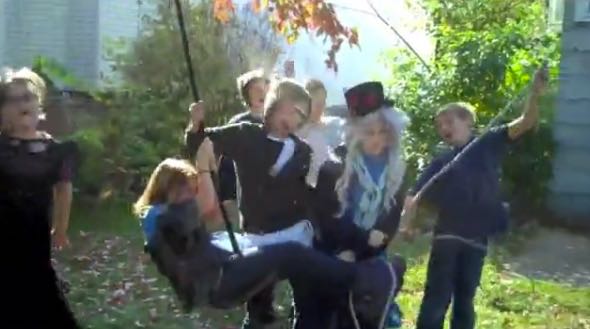
  • Give characters fun entrances. We have a big job in this shot: we must introduce three characters, the witches Mrs. Whatsit, Mrs. Who, and Mrs. Which. We’ll do it all in this one shot (which will subtly emphasize that they are all part of the same group). Each witch will pop in from a different direction, with a different characteristic line. First Mrs. Whatsit comes in from below . . .

Shot #7, Part 2: Mrs. Who

  • Constantly surprise the audience. . . . Then Mrs. Who comes in! Did you expect a witch to show up in the treehouse, the first time you saw this? Probably not. Put your characters in unusual places, surprise the audience! (Also: just as how, in the original book, Mrs. Who constantly quotes famous thinkers, she quotes Shakespeare here. Have your characters acting in character from the moment we see them.) And as the camera continues to pull out, we see . . .

Shot #7, Part 3: Mrs. Which

  • Things are funny in threes. . . . finally the third witch Mrs. Which comes swinging in from the side, screeching gleefully (and in character)! This part often gets a reaction or a laugh from the audience. But it wouldn’t be as funny if Mrs. Which swung in as the first witch, or the second witch. We set up a pattern with the first two witches appearing, and then broke that pattern, or fulfilled it in a special way, when the third witch came sailing in.
  • Every shot is an opportunity to do something amazing. All we really had to do at this point in the movie was introduce three witches. We could’ve just had them walk on camera and say the same things. But that would’ve been boring. All this camera movement and character movement makes what could’ve been a ho-hum introduction of three minor characters into a highlight of the movie! It costs no extra money to do a shot like this, just a little extra inspiration and planning. You have only 90 seconds to work with, so make every shot interesting!

Shot #8, Part 1: “But what is tessering?”

  • Just as before, background noise links shots into a scene. We’ve changed perspective, and so it’s useful that our ominous droning noise continues in the background, explicitly linking this shot to previous shots, so that it all feels like it’s happening in one scene. (Though the droning fades throughout this shot.)
  • Rule of Thirds. Meg’s head is positioned right at the intersection of two lines, fulfilling the Rule of Thirds.
  • Unbalanced symmetry again! Meg is walking towards the camera, and walking left-to-right, which makes her look like an active hero who is taking the initiative. The camera in turn backs away from her, creating an unbalanced symmetry on the right, which we unconsciously expect to be filled . . .

Shot #8, Part 2: “You see this string? And this insect?”

  • The unbalanced becomes balanced! . . . And that empty space is filled by Mrs. Whatsit on the right, when Meg swings around and this becomes an over-the-shoulder shot.
  • Props are better than no props. Using props like a string and a bug here keeps up the visual interest and makes it easier to understand what Mrs. Whatsit it talking about. Always introduce props into a scene if you can!
  • Rule of Thirds. Check it out: the bug and the string are right on the grid lines, so our eyes are irresistibly drawn to them.
  • This single shot is constantly changing. This shot (1) started as a medium shot of Meg, then (2) turned into a shot that was over Meg’s shoulder focused on Mrs. Whatsit, and then (3) Meg interrupts the witch’s explanation, so the shot changes again . . .

Shot #8, Part 3: “Okay, I get it.”

  • This single shot is constantly changing. . . . Meg walks away, leaving us alone with Mrs. Whatsit. The camera pushes closer in on Mrs. Whatsit so that now it’s a shot of just her. The lesson? By varying the shot in this complicated way—starting with Meg alone, proceeding to Meg and Mrs. Whatsit together, and ending on Mrs. Whatsit alone—we keep the audience engaged.
  • Reaction shots are often what make a joke funny. After Meg interrupts and dismisses Mrs. Whatsit, the shot lingers on the witch for a maybe half-second longer than expected, and that makes the joke land. If you’re wondering how a character should react to a joke, underplaying it (like here) is often funnier than overplaying it. (Mrs. Whatsit’s disappointed little blink also sold it for me.)

Shot #9: “Who’s This Guy?”

  • Don’t let characters just fade away. In a scene with many characters in it, we should check in on each of them periodically so remind the viewer that they still exist. We haven’t seen Charles Wallace in a while, so it’s good for the camera to focus on him now to remind us that he’s still in the scene, even if it’s only to remark on the entrance of Calvin.
  • What happens if you have an “and then”? In Step 3, I advised that events in a story should be linked by “therefore” (Mrs. Which said “it’s time to tesser,” therefore Meg asked “What is tessering?”) or “but” (Mrs. Whatsit tried to explain tessering, but Meg interrupted her and walked away). But sometimes events happen that aren’t directly related to what happened before, like when Calvin shows up in this movie. So we set it up by having Charles Wallace loudly say “Who’s this guy?” which tips us off that something is about to happen that wasn’t directly caused by anything that came before.

Shot #10, Part 1: Enter Calvin

  • Unbalanced symmetry again. Once again, we set up a shot where Meg is on the left and there is an empty space on the right that the viewer unconsciously wants to be filled—which will soon be filled by Calvin.
  • Depth of Field. Take advantage of stuff in the background if you can. We put the witches in the background to add visual interest (and because one of them will speak soon).

Shot #10, Part 2: “I’m Calvin O’Keefe”

  • Balanced Symmetry. The unbalanced symmetry is now balanced by the arrival of Calvin. It feels to the audience like Calvin automatically “belongs” in the group of friends because he has stepped into an empty place that looks like it had been reserved for him. This is visual storytelling! It’s all done without words!

Shot #10, Part 3: “What’s that?”

  • Keep It Moving! Notice that this movie doesn’t lag even once. Every single line pushes the story forward. Even at this emotional high point of Calvin and Meg falling for each other, there’s a crazy sci-fi zapping sound effect and without cutting we swing the camera over to Meg . . .

Shot #10, Part 4: “The universe rrrrriped!”

  • Don’t be afraid of elaborate shots. This shot (1) started with an unbalanced symmetry of Meg with the witches in the background, (2) became a balanced symmetry when Calvin stepped in, (3) pushed in on Meg when the crazy noise happened, and now (4) we swing from Meg and push forward toward the witches, and Mrs. Which says the universe has ripped. All in one shot! Again, it doesn’t take money to do a shot like this, just a little planning and creativity. And it’s much more interesting to watch than just a bunch of people blabbing their lines in one long stationary shot. Move the camera around, play with composition!
  • The background sound changes again. In the aftermath of the “universe ripping” noise, there is now an alienating “aftermath noise” buzzing along. The background noises are getting weirder and weirder: first a gentle thunderstorm, then an ominous hum, now a nerve-jangling buzz. Increase intensity as we get deeper in the story!

Shot #11: “That’s bad”

  • Sound design links shots together. The nerve-jangling buzz continues into this shot, linking it with the previous shot. Don’t underestimate the power of these background noises to set mood and do storytelling work on their own.
  • Push in to increase tension. This shot is very similar to our last shot of Charles Wallace. He hasn’t moved. But this shot is framed closer to him. If you make subsequent shots of the same subject closer and closer, that naturally ratchets up the tension. Use that trick!

Shot #12: Hyperspace

  • There are many ways to transition from shot to shot. So far, every transition from shot to shot has been a regular cut. But there are many ways to transition from shot to shot: not only a regular cut, but a dissolve, a fade out and then a fade in, a wipe, etc. Here we gradually dissolve from Charles to the “hyperspace” effect to bring us to the alien planet. The hyperspace stars-streaking-past video was downloaded from YouTube. The shot of Charles Wallace dissolves into the hyperspace, and then the hyperspace dissolves into the next shot of the kids on Camazotz. We very effectively feel like we’ve gone a mystical journey through space and time, and it took no money at all!
  • Free yourself from the defaults. Some moviemaking software makes it such that every transition is a dissolve by default. That looks terrible! You can change those defaults. Don’t let every transition be the same. Take control of your transitions. Make sure they’re serving the story.

Shot #13: Establishing shot on alien world

  • You don’t have to go to an alien planet to be on an alien planet. We’re supposed to be on an alien planet now, but really, the kids just moved from the back yard to the front yard of the same house! It feels “alien” because we tinted the footage using the usual video tools in iMovie. Also, a new, alien-ethereal background noise starts here and goes all throughout the next few shots, linking them together. Background noise is powerful! Use that power!
  • Use establishing shots to ground the audience’s expectations. Once again we are “behind” all of our heroes, “following” them into adventure. It wouldn’t have worked so well if our first shot on an alien planet had been a closeup of one of the characters in particular. We want to make it clear immediately that they (and only they, without the witches) have gone to a completely different place together.

Shot #14: Switch to the front view

  • Let’s see their faces. The previous shot was an establishing shot where we were “following” our heroes into the new world, so it was okay to see only the backs of their heads. But in general we want our heroes to be facing the camera most of the time, so we can see their faces and register their emotions. That’s what we do here.
  • Sound design matters. The alien-ethereal background noise continues, linking this shot to the previous shot.
  • Rule of Thirds. Calvin is exactly at the intersection of two lines, which makes sense because he’s doing the talking here.
  • Initiating a visual rhythm. In the previous shot, we saw this group from the back. In this shot, we see them from the front. In the next shot, we’ll see them from the back again. We’re establishing a rhythm that will pay off a few shots from now.

Shot #15: Enter the basketball boy!

  • Establishing a visual rhythm. We see our heroes from the back again, but closer. We’ve set up a pattern, going back and forth, ahead and behind this stationary group, getting closer every time. When this pattern is finally “broken” we will feel “relief.”
  • Sound design. The alien-ethereal background noise continues, linking this shot to the shots before and after it.
  • Rule of Thirds. Notice Meg and Charles are exactly at the intersections!

Shot #16: Confrontation with basketball boy

  • Intensifying the pattern. The pattern we established continues and escalates! We alternate back to seeing our group of heroes from the front again, but closer. The viewer develops an unconscious expectation: how will this pattern of shots be broken?

Shot #17: “I’m just playing basketball”

  • Pattern intensifies even more. We’ve set up a pattern where we go back and forth between looking at the kids and looking at the basketball boy, with each subsequent shot closer to its subject. We’ve moved so close to the basketball boy that we’ve gone over the shoulders of our heroes.

Shot #18: “Whatever, robot”

  • Breaking the pattern (visual). Our heroes break the pattern of alternating shots by MOVING (left to right, of course, and towards the camera, which makes them look like they’re dominant and in control), which destroys the distance between them and the robot boy. Also notice that our heroes are already moving when this shot has started. To see them move is a relief after they’ve been stationary for so long.
  • Breaking the pattern (audio). The alien-ethereal background noise ABRUPTLY STOPS (because we’re breaking the pattern). The combination of all these choices makes Calvin’s dismissive “Whatever, robot” line work all the better. (Also, it’s satisfying to see Calvin physically shove the “robot” out of the way. It’s powerful when characters touch.)

Shot #19: Entering IT’s lair

  • Background sound and adjusting the color are powerful tools! A new throbbing background noise begins and and a new reddish color tints the scene (both available through free tools in iMovie). This signals to the audience that we’re in a totally new environment from the last scene. (In actuality, we’re just in the basement of the same house where we’ve shot the rest of the movie.)
  • Vary the direction of movement. In the last shot our heroes were walking towards the camera; now they’re walking away from it. Alternate motions like this to keep it visually interesting.
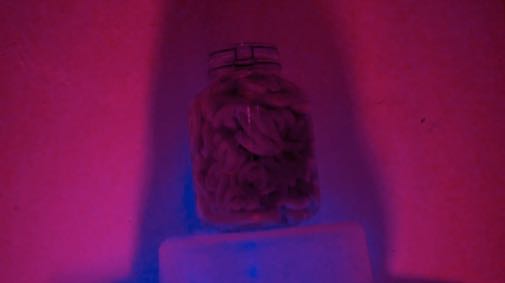
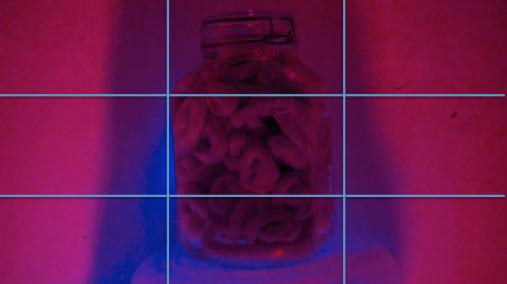
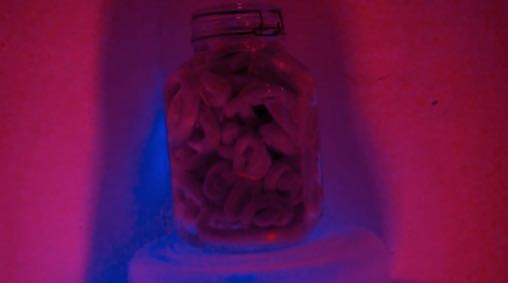
  • Special effects don’t have to be difficult or expensive. That “brain in a jar” is just some wadded-up foam tubing stuffed in a glass jar full of water. Nothing fancy, just stuff you can find sitting around the house.
  • Arouse the audience’s curiosity. The audience’s curiosity is aroused by watching the children approach the weird distant thing in the center of the frame. We also feel drawn to it because we’ve put the jar in the corner, and we’re walking towards that corner, so it feels like the whole universe is slanting towards this thing. What could that thing be . . . ?

Shot #20: IT

  • Sound design. The crackling background zapping throbs continue, linking this with the previous and subsequent shots.
  • The camera is caught up with the momentum of our heroes. Just as our heroes were drawing closer to the brain, so our camera is drawing closer to it too, satisfying the curiosity from the last shot.

Shot #21, Part 1: “Hi, Dad!”

  • Through camera movement, the audience can “discover” things at the same time as the heroes. As Meg whirls around to notice something hitherto unseen behind her, the camera pans to the right to show us too. By having the camera pan in this way, we “discover” who is behind Meg at the same time she does . . .

Shot #21, Part 2: “I’m not going to solve any of your problems”

  • Rule of Thirds. Mr. Murry’s face is smack dab at the gridline intersection!
  • Costume matters. With just a few easy costume choices (suit, book) we visually convey that Mr. Murry is a professorial type, just as in original story. This is effective visual storytelling, with not a word used! And not expensive either.
  • The “low angle” shot. By tilting the camera UP at Mr. Murry, he looks older and more dominant compared to Meg.

Shot #22: “You’ll never get your brother back”

  • Push in closer in subsequent shots to increase tension. Every time the movie cuts back to the brain-in-a-jar, the camera has drawn closer to it. This increases tension in a subtle way, perhaps without the audience even consciously noticing! But they will feel it.

Shot #23: “But what about the power of love?”

  • Watch the face! Meg starts the shot with her chin tucked, so we’re “looking down” at her (she is the underdog) but she ends the shot with her chin up, so we’re “looking up” at her (she has become dominant). This nonverbally signals that she has “won.”
  • Don’t be afraid of closeups! This shot only works because it’s a closeup on Meg’s face. Don’t be afraid to push your camera close into the actor’s faces! The more of their faces we can see, the more we can register their emotions. The worst thing to do is have too many scenes where the actors are faced away from the camera, and all we see is the backs of their heads.

Shot #24: “I never thought of that”

  • You can communicate plot information with sound design. As the brain in the jar “IT” falters, the background throbs and zaps also falter . . . and a bizarre new noise bloops up, signaling that something truly has changed. Use sound effects to convey plot information or convey emotions nonverbally!

Shot #25: The destruction of IT

  • Tell the story through action, images, and sound, not words. The evil droning and crackling sounds stop. The ominous red tint turns back to normal lightning. The glass shatters on the floor and the brain flops out. We don’t need to be told verbally that Meg has defeated this brain in a jar, because we’ve watched it happen, underscored by choices in visual design and sound design. This is much more powerful than someone saying “I won!” or someone else saying “I lost.” What we see and hear goes straight to the most fundamental parts of our brains, and is much more convincing than words people say.
  • Don’t be afraid to gross ’em out. And break some stuff along the way! Often when this movie is shown, it gets a shuddering “yuck” reaction from the audience at this point. Don’t be afraid to gross the audience out a little! It makes for a memorable movie! If the end of A Wrinkle in Time has a giant disembodied brain being defeated, let’s see that brain writhe and suffer! (Also: people love watching things break. The shattering of the glass jar is satisfying for audiences as well. Go ahead and break some things to make your movie, it’ll probably be worth it.)

Shot #26: Dance Party Credits Sequence

  • Go out on a high note! Ending the movie on a shattered glass jar and a dying brain would be abrupt and unsatisfying. This movie brings everyone out at the end for a crazy dance party over the ending credits. It feels satisfying to see all the characters again one last time, goofing off. This credit sequence does go a bit long, and at actual film screenings I might cut off your credits sequence to make room for other movies. But go ahead and have fun with yours.
  • Make the first shot and the last shot be opposites, to show how the story has changed the hero. Our first shot of this movie was a miserable Meg all alone, indoors, while it was raining. This final shot is a happy Meg with tons of friends, outdoors, on a sunny day. If you make the last shot the complete opposite of the first shot, it shows the progress the hero has made, and the way the world has changed through the action of the story. It’s a very satisfying technique to use.

And so concludes Part 4 of “How To Make A 90-Second Newbery.” (Here are Part 1, Part 2, and Part 3.) In the next post, we’ll look at easy-to-use editing tricks that can make your movie look great.

How To Make A 90-Second Newbery, Step 3: Breaking Your Story And Writing The Script

This is the third step in the “How To Make A 90-Second Newbery” series. If you haven’t already, check out Step 1: Watch Great Previous 90-Second Newberys and Step 2: Read The Book And Start Planning.

You’re ready to start the process of making your 90-Second Newbery video. You’ve watched previous successful 90-Second Newberys (Step 1). You’ve read the book, figured out a good “twist,” and pulled together some resources to make the movie happen (Step 2). What next?

You’ve got to write that script! With a solid script in hand, you have a much better chance of making a great movie.

In this post, I’ll start with some particular nuts-and-bolts advice on how to write a 90-Second Newbery script. Then I’ll expand the focus to give general advice on story structure that might prove useful.

So, let’s dive into advice on writing that script!

Wait, what’s a script? Maybe you’ve never written a script before. What does a script even look like? The good news is that it doesn’t matter if you do it “right” or “wrong.” This script is just for you and your group. The movie is the final product. That’s the only thing that really matters. A script is just a shared document that everyone can use to plan the movie.

Here is the shooting script that was used for the Wrinkle in Time 90-Second Newbery. Read it. It should be self-explanatory. (The only thing that might be mysterious are those scene headings. For those, INT means that the scene is shot indoors, and EXT means the scene is shot outdoors.)

Notice that the script is only 2 pages long. If your script is longer than 2 pages, your movie will probably be over 90 seconds. To be honest, that’s okay. We have some great “90-Second” Newberys that are actually 3 or 4 minutes long. But as a goal, you should at least try for 90 seconds. The movie will always end up running longer than you think it will.

Write a terrible first draft. I advise you jump right in. Take your first whack at writing the script, with the format of that Wrinkle in Time script as your guide. Don’t worry if your first draft is terrible or too long or unfunny or unoriginal. JUST GET A FIRST DRAFT DONE. You can worry about making it good later. You might even end up throwing away that first draft and starting over. That’s fine! Every time you write, you’re learning.

The “twist” you decided on in Step 2 will be crucial. It will give you the inspiration and direction to write this script. Maybe you will find, in writing the script, that the original “twist” you came up with doesn’t work. That’s fine! Throw out that twist and think up another! We’re early in the process, nothing is set in stone yet.

Make sure your script has a strong start. Kick off your movie with a visual situation that is fun or compelling or scary or weird! You’ve only got a few seconds to grab the viewer, so make those first few seconds count!

If writing a script beginning-to-end intimidates you, give yourself permission to write fragments out of order. Think of some “holy cow!” moments, some jokes, some scene ideas based on your twist. Once you have a lot of them, THEN think of ways to string them together.

Remember that movies are a visual medium. They’re about images, not words. Your script shouldn’t be of a bunch of people standing around talking, explaining the plot. As much as your story allows, your script should be chock-full of physical action, high-drama moments with lots of emotion, lots of scene changes to different interesting locations and costumes. You may be helped by what we learned from the movies we watched in Step 1—cinematic techniques like voiceover, green screen, special effects, shot composition, camera movement, etc.

Don’t be afraid to change the original story from the book. You only have 90 seconds to work with, so it’s unavoidable you’ll have to cut out a lot. It’s OK to merge two characters into one, drop subplots, change the order of events, etc. And if your changes are in service of the genre twist (think of the James Bond version of Ramona and Her Father, or the zombie version of Mr. Popper’s Penguins), then all the better!

Once you’ve knocked together a terrible first draft, have everyone in your group look at it and offer suggestions on how to make it less terrible. After you’ve taken those suggestions, give your edited-but-still-terrible first draft to someone who isn’t even in the group, someone who hasn’t even read the book. What do they think? Does the script make sense to them? Or is it truly terrible?

Oh no! My terrible first draft really is terrible! That’s okay, it’s supposed to be terrible. What, did you think you’d write something perfect off the top of your head? That’s not how creativity works. You must embrace the possibility of writing garbage in order to free yourself to find the good stuff. A bad first draft is better than no draft at all.

Let’s put that terrible first draft aside for a moment. Forget about it for now. Let’s look at the original story again.

The number one problem I see in bad 90-Second Newbery movies is that the movies make no sense. I mean literally no sense, like it’s impossible to tell what’s going on. This happens because the filmmakers try to cram too much plot into a short movie. They don’t know which scenes to keep and which to discard. And the scenes aren’t linked to each other in a storylike way. They just all feel like disconnected bits that have nothing to do with each other.

How do you avoid that fate? After all, it’s easy for these movies to get confusing and incoherent, because so much story info is being smooshed into such a short timeframe.

Luckily, there’s a great method.

Discover the “beats” of the story, and determine how each is linked with the magic words therefore or but. I didn’t invent this next piece of advice. I learned it from the creators of South Park, Trey Parker and Matt Stone. They explain it better than I can in this video.

In case you can’t watch that video, I’ll explain it here and point out how it relates to the 90-Second Newbery.

In order to keep our story feeling like a story, we must always make sure our audience understands what is happening in the story, and why it is happening. Otherwise, the audience will be bored or confused.

The good news is that you already have a good story. After all, the book you’re adapting won a Newbery Medal or Honor. So the fundamentals of its structure are probably sound. Your story has good “bones.” So let’s take a closer look at that story.

To get a grip on what you need to write, try writing out the “beats” of the original story—the important actions that cause big changes.

For instance, in A Wrinkle in Time . . .

1. Teenager Meg is dissatisfied with her life, especially that her Dad is missing
2. Meg hangs out with her little brother Charles Wallace and they meet friendly witches
3. Meg and Charles Wallace discover their Dad is being held on another planet
4. The friendly witches take them to the other planet

. . . and so on.

Once you’ve written out the “beats” of the story, try to find a way in your script to link each beat to the next beat by cause-and-effect. That means, many of the beats of the story should somehow cause the next beat to happen. Beat 1 happens, therefore Beat 2 happens. “Bob heard a noise outside, therefore he went to investigate.” “Susan saw the monster coming, therefore she hid behind the tree.”

You won’t be able to do it in every beat. That’s because sometimes the beats aren’t linked by cause-and-effect, but rather an unexpected resistance or complication. That is: Beat 1 happens, but Beat 2 happens. “Caroline wanted to buy an apple, but the grocery store was closed.” “Sam wanted to ask Lisa to the dance, but Lisa told Sam she was already going with Zack.”

Alert! Here’s what doesn’t work in a story: Beat 1 happens, and then Beat 2 happens. A story fails when too many beats lack a “therefore” or “but” connection, but are simply one thing after another. “I went into the basement and then my dog died and then my dad made pasta for dinner and then aliens blew up the world.” All these incidents in isolation might be interesting, but they’re not related to each other in any story-like way, and so the audience will get confused and unhappy and bored.

To sum up: write your script such that as many story beats as possible can be connected to the next by the word therefore or but, and not merely and then. It will make the story easier to understand—and don’t be afraid to change the story a little in order to make these links clearer!

By the way, you will definitely have to discard some of the original beats of the story in order to make a short movie. Our version of A Wrinkle in Time completely drops the Happy Medium, Aunt Beast, Sandy and Dennys, the Man with Red Eyes, the trip to Uriel, and more. And then it stitches the remaining beats together, connecting them with therefore (Charles Wallace hears a noise outside, therefore he and Meg go outside) or but (Meg, Charles Wallace, and Calvin tesser to Camazotz, but their way is blocked by a basketball-playing robot) with a minimum of and then.

Again, you can see Trey Parker and Matt Stone of South Park explain this insight in this video.

Another way of organizing your story: Dan Harmon’s “Story Circle.” Here’s writing advice from another successful TV writer, Dan Harmon (the showrunner of the NBC sitcom Community and the co-creator of the Cartoon Network’s Rick and Morty). I’m offering it not because your script necessarily has to follow this scheme, but because it’s another helpful way to think about story structure, and it might help your script.

Dan Harmon adapted his “Story Circle” from the anthropologist Joseph Campbell’s idea of “The Hero’s Journey.” I, in turn, am going to adapt my explanation from Dan Harmon’s own essay, which you can read here (warning, there is some salty language): Part 1, Part 2, Part 3, and Part 4.

In the “Story Circle,” many stories can be broken down into seven simple steps:

  1. A character is in a zone of comfort
  2. But they want something.
  3. They enter an unfamiliar situation,
  4. Adapt to it,
  5. Get what they wanted,
  6. Pay a heavy price for it,
  7. Then return to their familiar situation,
  8. Having changed.

You can arrange these steps around a circle, like so:

Let’s look at these steps one-by-one in the context of some Newbery-winning books and well-known movies, and see how that knowledge can be used in making your video. Then we’ll observe how these steps are fulfilled in a classic 90-Second Newbery video.

1. “You” – ESTABLISH A PROTAGONIST

In your movie, you need to make it clear as quickly as possible who the protagonist of the story is. If not, the audience will get frustrated watching a bunch of different characters of confusingly equal importance. If the audience can get inside a specific character, then they can get inside the story.

In Star Wars, we don’t meet Luke Skywalker until 20 minutes into the movie. But you only have around 90 seconds! So your hero must be the first person the audience sees, or one of the first. Have that hero say a line or do something interesting in character right away. Make the hero’s name clear as quickly as possible.

In A Wrinkle In Time, we start with Meg worrying in bed during a storm. In Mrs. Frisby and the Rats of NIMH, we immediately meet Mrs. Frisby and learn she is the head of a family of field mice living in a farmer’s garden. In From the Mixed-Up Files of Mrs. Basil E. Frankweiler, we learn in the first sentence that Claudia is a kid who wants to run away, but wants to do it in a certain way.

If you give the audience a clear protagonist with a personality right away, the audience will be on board, grateful that they have a hero to root for.

2. “Need” – SOMETHING AIN’T QUITE RIGHT

This is where we show that something is not quite right in the universe, no matter how large or small that universe is. And that problem shows us what the hero wants.

In A Wrinkle in Time, the big problem is that Meg’s father is missing. In Mrs. Frisby and the Rats of NIMH, the problem is that Mrs. Frisby’s baby mouse Timothy is sick and can’t be moved, and the farmer is planning to plow up Mrs. Frisby’s home. In From the Mixed-Up Files of Mrs. Basil E. Frankweiler, the problem is that Claudia feels bored and unappreciated in her family.

In all these cases, that problem—the thing that’s not right in the world—leads to a specific want for the hero. Meg wants to find her father. Mrs. Frisby wants to move the house and heal Timothy. Claudia wants to run away from home and have an adventure.

3. “Go” – CROSSING THE THRESHOLD

This is where your hero takes action and enters the world of adventure. Meg meets the witches and agrees to travel into space to rescue her father. Mrs. Frisby risks her life by going to visit the owl and the rats to enlist their help. Claudia teams up with her brother Jamie and they run away to the Metropolitan Museum of Art.

This step is what your story is “about.” It’s the thing you would put on the movie poster. Everything below this part of the circle is the “special world,” the “adventure world.” Luke has blasted off of Tatooine with Han Solo and everyone else on the Millennium Falcon. Indiana Jones gets on a plane in search of the Ark of the Covenant. If possible, show the contrast between these two worlds—the ordinary world we’ve inhabited until now, and the world of adventure we must now grapple with.

4. “Search” – THE ROAD OF TRIALS

This is where your hero meets the challenges that crop up when they pursue their goal. Our hero gets thrown into the deep end of the adventure, and now it’s sink or swim!

Meg, Charles Wallace, and Calvin travel through space and time and try to come to grips with the evil alien planet of Camazotz. Mrs. Frisby uses her wits and bravery to find her way into the rat’s nest, and discovers the rats are secretly technological geniuses. Claudia and Jamie figure out how to survive living at the Metropolitan Museum of Art: scrounging money, hiding in the bathrooms to avoid guards, learning about the museum’s collections.

This is the part of the story where our hero is making allies and fighting enemies. Luke Skywalker and his friends are running around inside the Death Star, fighting storm troopers. Indiana Jones is traveling to exotic places, joining with old friends Marion and Sallah, and digging in the desert. Our hero is adapting to the world of adventure, they are meeting the challenges that are thrown at them, which leads us to . . .

5. “Find” – MEETING WITH THE GODDESS

The test and difficulties of the previous “Road of Trials” have all prepared your hero for this moment. At this moment, your hero finds what they were looking for . . . although it’s never exactly what they had expected.

This is a special pivot point. It’s at the very bottom of the circle, in the center. Imagine your hero began at the top and has tumbled all the way down here. The story’s natural tendency to pull your hero downward has done its job, and for a moment, we are in a special state. This is a time for major revelations, and total vulnerability.

After this point, everything will take a different direction. It will a new kind of effort for the hero, and the hero will have to make more difficult choices, after this point.

This is where Meg finally finds her father on the evil planet Camazotz—but he’s not going to solve their problems, as she’d hoped. Mrs. Frisby gets the rats to agree to help her—but she also learns that her dead husband was best friends with the rats, that he shared a history with them, though he never shared that secret with her. Claudia and Jamie manage to solve the mystery of who carved the “Angel” statue in the museum. In Frozen, Anna finally finds Elsa in her ice castle.

This is an important moment. The hero wins a brief victory here, and seems to get what they want. Luke Skywalker finally rescues Princess Leia in the depths of the Death Star. Indiana Jones finds the Ark of the Covenant. But this leads to the next step . . .

6. “Take” – MEET YOUR MAKER

Everything falls apart here. The goal your hero sought—and for a moment, thought he had achieved—is actually further away than ever. Or the dream your hero tried to achieve turned out to be a nightmare. Or the hero got his goal, but it led to all kinds of catastrophic side-effects. In short: there is a price for meeting the goddess. This is the part of the story where things get real.

This is where your hero must suffer.

If this is an action movie, this is the part where our hero gets his butt kicked. In a love story, this is the part where they break up. The friend the hero trusted turns out to be a traitor. The mentor who trained the hero dies. The dark night of the soul happens here.

Meg gets her father away from the evil of Camazotz, but she ends up leaving her now-hypnotized brother Charles Wallace behind. The plan goes wrong and Mrs. Frisby is captured by the farmer’s family. The museum dismisses Claudia’s and Jamie’s discovery about the statue, and Claudia cries, and they consider going home in a kind of defeat.

Up until now, everything in the adventure has been preparing the hero for that meeting with the goddess. Now the hero is paying the price.

Luke Skywalker may have rescued Princess Leia, but he still has to fight his way out of that nightmarish space station, and watch his mentor Obi-Wan Kenobi get murdered by Darth Vader, before he can totally escape. Indiana Jones may have found the Ark of the Covenant, but the Nazis steal it from him almost immediately, and they leave him in the pit to die. Anna may have found Elsa, but Elsa blasts Anna in the heart with her ice-power.

Here the hero has to suffer the unendurable, learn the worst truths, come face to face with their weaknesses, and lose their allies.

7. “Return” – BRINGING IT HOME

This is the opposite of “crossing the threshold” in step 3. We are now leaving the world of adventure, and that’s not easy. It was difficult to get in, and it’ll be difficult to get out. This is the point where the hero must reach deep down, be inventive, and risk everything they’ve got.

Meg goes back to Camazotz, alone, to save Charles Wallace. Mrs. Frisby escapes the farmer and warns the rats that their home is about to be destroyed, and the rats abandon their nest just in time. Claudia and Jamie, instead of buying a train ticket home, instead audaciously buy a ticket to visit Mrs. Basil E. Frankweiler herself.

If this is an action movie, here’s where you have your big car chase or bonkers fight scene. Or, in a love story, having realized what’s important, the hero must run all the way across town before his girlfriend gets on the plane and leaves his life forever. Luke Skywalker and Han Solo blast through a whole squadron of TIE fighters, they make it to the rebel base, but then Luke decides to join the Rebellion to return to the Death Star and blow it up. Indiana Jones takes one wild risk after another to chase the Nazis who have stolen the ark from him.

But for the hero get the ultimate prize, and finish the story, the story must demonstrate how the hero has changed. Which leads us to the final step . . .

8. “Change” – MASTER OF BOTH WORLDS

The hero faces a final challenge or situation, and the way he deals with the challenge shows us how the story has changed him.

Meg stops worrying about herself and takes a bold risk, using just her love to rescue Charles Wallace from the giant disembodied brain. She’s a much braver Meg than the girl we met at the beginning. Claudia and Jamie are able to navigate Mrs. Basil E. Frankweiler’s mixed-up files, using the knowledge and moxie they’ve gained over the adventure to find the true solution to their mystery. It shows how Claudia and Jamie have both grown, both individually and as a team.

In an action film, this is where you put the ultimate showdown between the hero and the villain. In a love story, this is where the hero runs across the tarmac, stops the airplane, gets on board and makes a big speech to his girlfriend that causes her to love him again and take him back.

This is where the hero proves how the story has changed them.

In Star Wars, Luke uses what he’s learned about the Force to do the impossible and blow up the Death Star. This proves he’s no longer a naive farm boy, he’s on his way to being a Jedi knight. In Raiders of the Lost Ark, Indiana shuts his eyes when the ark is opened, because this once-skeptical archeologist now believes in and respects its supernatural power.

The hero is has changed. They have been to the strange place, they have adapted to it, they have discovered some true things, and now they are back where they started (though not necessarily literally). But our hero is now forever changed, and perhaps able to create change too.

They’ve earned it. You’ve watched them earn it. And that’s why it’s a good story.

Uh, cool story bro, what does this have to do with the 90-Second Newberys? Good point. That’s a lot of story structure to learn, but what does that have to do with making a movie?

Well, remember how I said that the number one problem with bad 90-Second Newbery movies is that they don’t make any sense? That they just seem to be like a random collection of scenes? You can use this Story Circle to organize your script, so that it truly feels like a story.

To make your movie feel like a satisfying re-telling of the original Newbery book, find what elements of that original story correspond to the points on the Story Circle, and write your script with that in mind. Those eight story beats on the Story Circle are probably already in that Newbery book in one form or another, you just have to read it carefully to find them. And use that to structure your script.

Let me give you an example based on a simple story. Here’s a 90-Second Newbery of the vignette “Monsters and Giants,” from Frog and Toad Together:

Pretty good movie, right? Definitely one of the best that I’ve received. And one of the reasons for that is—aside from the adorable puppets, the entertaining voiceover work, the ingenious cinematography—it fulfills all eight points of the Story Circle:

Pretty nifty how that works, huh? So if you’re wondering what scenes are important to include from the book in your 90-Second Newbery movie, the Story Circle can be an invaluable tool.

And you just learned some important truths about how stories work in the bargain!

That’s it from Step 3 of “How To Make A 90-Second Newbery.” In the next post, we’ll analyze an existing 90-Second Newbery movie to give you tips on cinematography, camera movement, sound, and editing!

How To Make A 90-Second Newbery, Step 2: Read The Book And Start Planning

This is Step Two in the “How To Make A 90-Second Newbery” series. Click here to read “Step One: Watch Great Previous 90-Second Newberys.”

So you want to make your own movie for the 90-Second Newbery Film Festival. You’ve watched previous 90-Second Newbery movies as I recommended in Step 1 and gleaned lessons from them. You’re fizzing with ideas! You’re ready to rock! So what now?

Choose the book that you’ll adapt into a movie. Any Newbery Medal Winner or Newbery Honor Book will do, from 1922 to today. I made a list of all the Newbery Medal Winners and Honor Books where you can click on a book title to see all of its 90-Second Newbery movies. Is a certain book title not clickable? That means no movie has been made of it yet! (You should consider filming one of those books, by the way. It’ll make your movie stand out. Every year we receive way too many versions of The Giver. There are other books, people!)

Read the book and decide how you feel about it. Only make a movie of a book that interests you. You might love the book and want to honor it with your movie. Or maybe you only kinda-sorta like the book, and there are certain things you’d like to change about it in your movie. Heck, maybe you hate the book, and you’re burning to make a movie that’s a biting satire of it! That’s fine! Adapt a book that you have a definite point of view about, either for good or for ill.

Think about what kind of “twist” your movie will put on the story. A straightforward adaptation of the story is okay (like this movie of A Wrinkle in Time), but trust me, your movie will be better if you make it with a weird twist.

What do I mean by a “weird twist”? Here are some examples.

Telling the book’s story in a different genre. By “genre” here I mean a specific style of movie, like “horror” or “Western” or “musical.” By retelling the story of the book using the tropes and conventions of a certain genre, you can make your movie much more interesting. Remember those movies I reviewed in Step 1? Many of them worked because they transformed the story into a different genre, such as . . .


A musical. This song-and-dance version of The Twenty-One Balloons (watch) features a big cast singing original songs, with fun costumes and great acting. Bonus: an erupting volcano!


A silent movie. This black-and-white silent movie of Crispin: The Cross of Lead (watch) tells the story visually through eye-catching action and brisk intertitles.


A horror movie. This scary version of Charlotte’s Web (watch) reveals the hidden dark underbelly to this beloved, seemingly innocent animal tale. Grotesque and disturbing!


A James Bond movie. This spy version of Ramona and Her Father (watch) shakes and stirs the mild domestic comedy of Beverly Cleary with the glamorous, violent 007 franchise, to absurd comic effect.


A zombie apocalypse. The gentle animal capers of Mr. Popper’s Penguins (watch) take a deadly turn when the penguins start acting like bloodthirsty zombies.


A Star Wars movie. Lightsabers! Space battles! John Williams music! This version of The Whipping Boy (watch) set in a galaxy far, far away has it all.


A Japanese samurai movie. These kids wear kimono and speak in subtitled Japanese in an Akira Kurosawa-style retelling of Heart of a Samurai (watch).


There are so many other styles you can do, too! For instance, you can do your movie in the style of a badly produced 1990s sitcom with a canned laugh track and corny jokes. Or as a weepy telenovela. Or as a Godfather-like gangster movie. Or as a cowboy western. Or in the style of lucha libre (Mexican professional wrestling). Or as a Ken-Burns-like documentary. Or in the style of a Marvel superhero movie. Or in the style of a “gritty reboot.” Or in the style of a director who has immediately recognizable tics, like Wes Anderson or Alfred Hitchcock or Zack Snyder.

Hint: The more unlike your genre choice is to the original book, the more interesting your movie will probably be. Charlotte’s Web is a very sweet story, which is why the bonkers horror-movie version of Charlotte’s Web works so well.

But your movie’s twist doesn’t have to be a different genre. You have other options, such as . . .

Telling the book’s story in an unusual medium. There are so many ways to make a movie other than straight-up live-action. You can also make your movie using:


Claymation. The characters in this masterful stop-motion clay version of The Apple and the Arrow (watch) are better actors than a lot of living, breathing people!


Puppets. You can get a lot of goofy, endearing physical comedy out of puppets, as this version of Frog and Toad Together (watch) shows.


Animation. Good at drawing? Consider doing an animated version of your story, like this impresssive version of Holes (watch).


Minecraft. Take advantage of your Minecraft skills to pull off some jaw-dropping world-building and moviemaking, like this Minecraft version of Millions of Cats (watch).


Lego Stop Motion. Stop motion work takes diligence and time, but the effects can be astonishing, like this lego version of The Wright Brothers: How They Invented the Airplane (watch).


All Robots! Why not make an all-robot version of the book, like this funny version of Ramona Quimby, Age 8 (watch) (my favorite part is how the robot “vomits”).


There are various other unusual ways you could use to tell your story. You could make an all-emoji version (here’s a video for “Do You Want to Build A Snowman?” done entirely in emojis); or in the style of side-scrolling video game like Super Mario Bros. (oh, you don’t think you can tell a good story that way? Check out this side-scrolling story); or tell your story through the chain-reaction machinations of a ridiculously elaborate Rube Goldberg machine (you can get your Rube Goldberg inspiration here)

There are other ways to give your movie a compelling twist! The more creative your “twist” is, the better! Try switching out an element of the movie: for instance, Julie of the Wolves can become Julie of the Cows. Or have the camera stay strictly in the point of view of just one character, like Because of Winn-Dixie told only from the POV of the dog. Or do something like this movie of The Sign of the Beaver, in which a boy tries to tell his father the story of the book, while the father keeps trying to change the story as the boy is telling it.

What I’m trying to say with all of this is: have fun with your movie adaptation of the book! Do something weird, original, and memorable! It will almost always be a stronger choice than a straightforward adaptation.

Figure out your resources. At the same time that you’re choosing a book to make a movie of, and figuring out the “twist” that will make your movie original, you should keep in mind the resources that you already have. What do you already have access to in terms of costumes, props, talent, and locations that you can use in your movie?

For instance, you may have some toy lightsabers and a Darth Vader costume sitting around. If so, maybe consider making your movie in the style of a Star Wars movie! Or maybe you and your friends have beautiful singing voices. In that case, consider making your movie in the style of a musical! Maybe there’s a creepy graveyard near your house. In that case, you could use it as a location for an adaptation of The Graveyard Book. Maybe your friend’s uncle’s friend has a horse farm. Then how about adapting Misty of Chincoteague with real horses?

As you’re choosing a book and a twist, keep your resources in mind. You might end up deciding to adapt a certain book in a certain style because you already have the specific resources to do it well.

So: raid your parents’ closets! Rummage through the storage areas in your home! What do you already own that you can use? Go to Goodwill or Salvation Army and see what fun costumes and props you can get for cheap! Visit your school’s drama department to see what costumes and props they have in storage that maybe you can borrow! Ask around with your friends about what resources they have! Look around your neighborhood to find locations that would look great in a movie!

Put a team together. Who among your friends would be perfect for certain roles? Who might be able to write a good script? Who are the good actors? Who has experience behind the camera? Who has the patient temperament to do editing after the shooting is done? Who is interested in post-production and maybe even doing special effects?

To sum up this post’s advice: before you start making your movie, choose a book you’re interested in, read it attentively, give it a twist that you’re enthusiastic about, and finally bring together a team and resources to make a great movie that’s within the reach of your skills, time, budget, and supplies.

That wraps it up for Step 2 of “How To Make A 90-Second Newbery.” In the next post, we’ll talk about analyzing the story of the book so you can write a great script!